Using extract-i18n Command in Angular CLI
January 08, 2022
On this page we will learn using extract-i18n command in Angular CLI.
1. Angular CLI provides
extract-i18n command to extract the marked text in the component into a source language file.
2. The
extract-i18n command is run from project root directory as following.
ng extract-i18n
messages.xlf file in project root directory.
3. The following marked text are included in translation.
a. The text included by element marked with i18n .
b. Attributes marked with i18n- attribute.
c. Text tagged with $localize .
Contents
Technologies Used
Find the technologies being used in our example.1. Angular 13.1.0
2. @angular/localize 13.1.0
3. Node.js 12.20.0
4. NPM 8.2.0
Step-1: Enable Localization Features
To enable localization features in our Angular CLI application, we need to add@angular/localize package as following.
ng add @angular/localize
package.json is located. This command will update package.json and polyfills.ts files in our project.
Step-2: Create HTML Template
Use i18n, i18n- attribute and $localize for those text which needs to be internationalized.app.component.html
<h1 i18n> Hello World! </h1>

<img src="https://www.concretepage.com/images/favicon.png" i18n-title title="ConcretePage Logo" />

<p i18n> This is winter season.
   And there is lots of cold here. </p>
import { Component } from '@angular/core';

@Component({
  selector: 'app-root',
  templateUrl: './app.component.html'
})
export class AppComponent {
}
import { NgModule } from '@angular/core';
import { BrowserModule } from '@angular/platform-browser';
import { AppComponent } from './app.component';

@NgModule({
  imports: [BrowserModule],
  declarations: [AppComponent],
  bootstrap: [AppComponent]
})
export class AppModule { }
Step-3: Run extract-i18n Command
Theextract-i18n command is run from root directory of the project.
ng extract-i18n
messages.xlf file in project root directory.
Find the options to be used with
extract-i18n command to change the source language file location, file name and format.
--output-path : Set the path of the output directory.
--out-file : Set the name of the output file.
--format : Set the format of the output file.
a. Using
--output-path option.
ng extract-i18n --output-path src/locale
messages.xlf is created in src/locale directory.
b. Using
--out-file option.
ng extract-i18n --out-file mymessages.json
mymessages.json is created in root directory of the project.
c. Using
--format option.
ng extract-i18n --format=xmb
messages.xmb is created in root directory of the project. Source language file can be created into .arb, .json, .xlf and .xmb formats.
d. Using
--out-file and --output-path options together.
ng extract-i18n --out-file mymessages.json --output-path src/locale
mymessages.json is created in src/locale directory.
Step 4: Create Translation File for Each Language
1. Run the following command from root directory of the project.ng extract-i18n --output-path src/locale
messages.xlf file in src/locale directory.
messages.xlf
<?xml version="1.0" encoding="UTF-8" ?>
<xliff version="1.2" xmlns="urn:oasis:names:tc:xliff:document:1.2">
  <file source-language="en-US" datatype="plaintext" original="ng2.template">
    <body>
      <trans-unit id="7121872801180631554" datatype="html">
        <source> Hello World! </source>
        <context-group purpose="location">
          <context context-type="sourcefile">src/app/app.component.html</context>
          <context context-type="linenumber">1</context>
        </context-group>
      </trans-unit>
      <trans-unit id="619064616906340334" datatype="html">
        <source>ConcretePage Logo</source>
        <context-group purpose="location">
          <context context-type="sourcefile">src/app/app.component.html</context>
          <context context-type="linenumber">3</context>
        </context-group>
      </trans-unit>
      <trans-unit id="646710550689369795" datatype="html">
        <source> This is winter season. And there is lots of cold here. </source>
        <context-group purpose="location">
          <context context-type="sourcefile">src/app/app.component.html</context>
          <context context-type="linenumber">5,6</context>
        </context-group>
      </trans-unit>
    </body>
  </file>
</xliff>
messages.xlf file in src/locale directory with following syntax.
message.{locale}.xlf
messages.fr.xlf
messages.xlf file.
<trans-unit id="7121872801180631554" datatype="html">
  <source> Hello World! </source>
	<context-group purpose="location">
	  <context context-type="sourcefile">src/app/app.component.html</context>
	  <context context-type="linenumber">1</context>
  </context-group>
</trans-unit>
<target> tag and put here French translated text of <source> tag text.
<trans-unit id="7121872801180631554" datatype="html">
  <source> Hello World! </source>
  <target> Bonjour le monde! </target>
  <context-group purpose="location">
      <context context-type="sourcefile">src/app/app.component.html</context>
      <context context-type="linenumber">1</context>
  </context-group>
</trans-unit>
Run Application
To run the application, find the steps.1. Download source code using download link given below on this page.
2. Use downloaded src in your Angular CLI application. To install Angular CLI, find the link.
3. Add
@angular/localize library.
4. Run ng serve using command prompt.
5. Access the URL http://localhost:4200
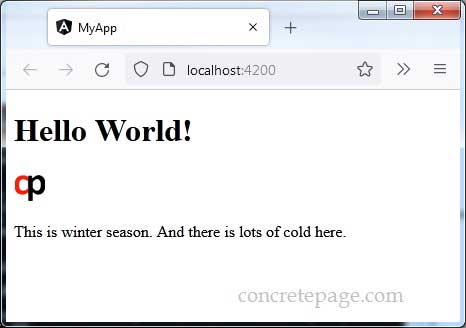
Find the print screen of the output.


