Creating Android Vector Drawable
June 29, 2023
On this page we will learn to create Android vector drawable.
1. The
VectorDrawable creates drawable based on an XML vector graphic. It is defined in an XML file with the <vector> element.
2. The vector drawable is a set of points, lines and curves along with its associated colour information.
3. The advantage of vector images are that it can be scaled without loss of display quality. Hence we need not to keep different sizes of same image. In this way the APK size will be lower.
4. We can also use vector images for animation by using multiple XML files instead of multiple images for each display resolution.
5. Vector images can be created by writing XML code. We can use Android Studio to convert SVG files into vector drawable XML files. Android Studio can also directly create vector images for the selected clip-art.
1. Creating VectorDrawable
1. TheVectorDrawable creates drawable using XML files containing <vector> element.
2. A
<vector> can contain <group> and <path> elements.
3. A
<group> element can contain <path> and <clip-path> elements.
4. The attributes of
<vector> element are android:width, android:height, android:viewportWidth, android:viewportHeight etc.
5. The attributes of
<group> element are android:name, android:pivotX, android:pivotY, android:rotation etc.
6. The attributes of
<path> element are android:name, android:strokeColor, android:strokeWidth, android:strokeLineCap, android:pathData etc.
2. Creating pathData of <path> Element
The <path> element defines path to be drawn. Its attribute pathData defines path data using exactly same format as ‘d’ attribute in the SVG's path data. To create pathData, find the commands.
1. Line Commands:
M : Move To command. It takes two parameters x, y coordinates. The M command appears at the beginning of paths to specify where the drawing should start. For the point (5, 8), we use M as M 5 8 .
L : Line To command. It takes two parameters x, y coordinates. The L command draws a line from the current position to a new position. For the point (6, 7), we use L as L 6 7 .
H : Draws horizontal line. It takes one parameter.
V : Draws vertical line. It takes one parameter.
Z : Close Path command. This command draws a straight line from the current position back to the first point of the path.
2. Curve Commands :
C : Creates a cubic curve taking two control points for each point as C x1 y1, x2 y2, x y.
S : Creates the curve taking two points as S x2 y2, x y .
Q : Quadratic curve as Q x1 y1, x y .
T : Stringing together multiple quadratic curve T x y .
A : Creates arc as A rx ry x-axis-rotation large-arc-flag sweep-flag x y .
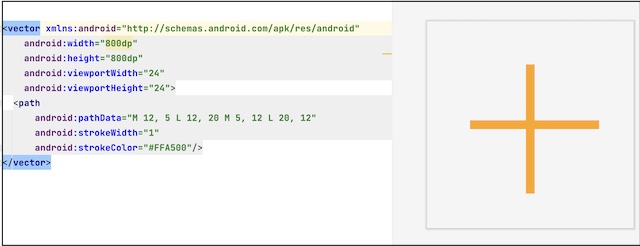
Find the sample code to create vector image. I am creating a path using
pathData as "M 12, 5 L 12, 20 M 5, 12 L 20, 12" .
res/drawable/plus_sign.xml
<vector xmlns:android="http://schemas.android.com/apk/res/android"
    android:width="800dp"
    android:height="800dp"
    android:viewportWidth="24"
    android:viewportHeight="24">
  <path
      android:pathData="M 12, 5 L 12, 20 M 5, 12 L 20, 12"
      android:strokeWidth="1"
      android:strokeColor="#FFA500"/>
</vector>

3. Creating Vector Images using Android Studio
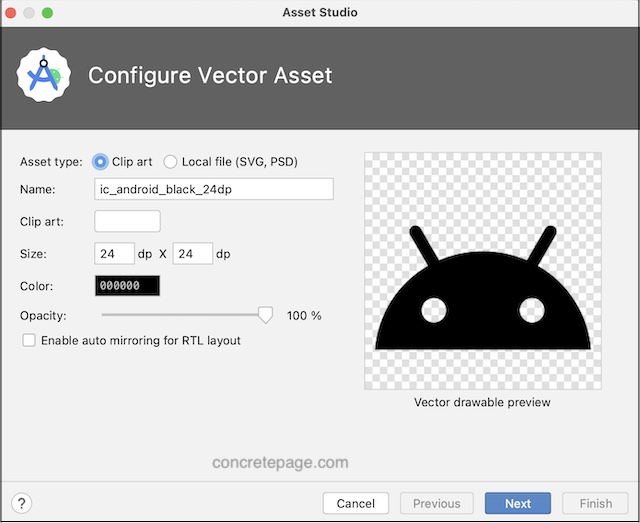
Step-1 : Go to File -> New -> Vector Asset . We get following screen
Now click on the Next.
Step-2 : Select the source set such as src/main/res and then click on Finish. Our vector drawable XML file will be created under src/main/res directory.
4. Convert SVG into Vector Image using Android Studio
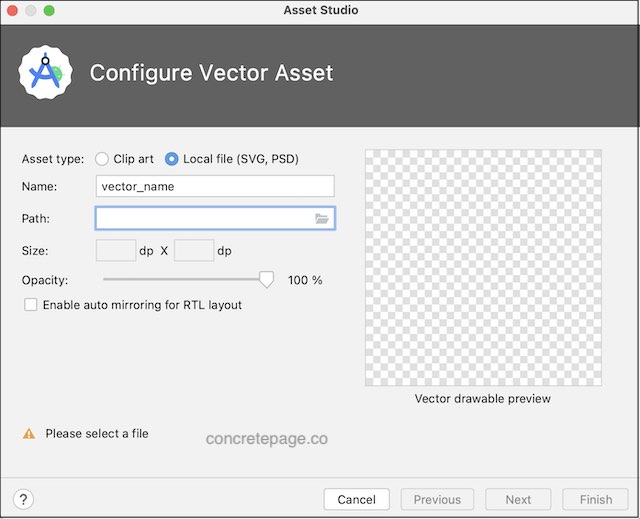
Step-1 : Go to File -> New -> Vector Asset . Select asset type as Local file(SVG, PSD). We will get following screen.
Step-2 : Select the source set such as src/main/res and then click on Finish. The vector drawable XML file equivalent to selected SVG file, will be created under src/main/res directory.


