TestNG Integration with Eclipse
March 20, 2023
On this page, we will learn TestNG integration with Eclipse.
1. TestNG is Java based testing framework developed by Cédric Beust inspired by JUnit and NUnit. NG stands for Next Generation.
2. In JUnit, the test class is instantiated for its every test method whereas TestNG is instantiated only one time.
3. In JUnit, the
@BeforeAll and @AfterAll methods need to be static whereas in TestNG the equivalent methods @BeforeClass and @AfterClass are not static methods.
4. Find some features of TestNG testing framework.
a. Supports annotations.
b. We can run our tests in arbitrarily big thread pools with various policies available.
c. We can test whether our code is multithread safe.
d. Supports flexible test configuration.
e. We can perform data-driven testing.
f. Support for parameterized tests.
g. Supported by Eclipse, IDEA, Maven, etc
h. We can embed BeanShell for further flexibility.
i. Uses default JDK functions for runtime and logging.
j. Supports dependency testing.
5. We can integrate TestNG with Eclipse either using Marketplace or Install New Software in Help section. In Marketplace, we can search for TestNG and install it.
6. Here in our page we will install TestNG using Install New Software in Help section. First go to bellow URL.
TestNG Eclipse Plugin Update Site
Select update site URL. For example, I have selected
https://testng.org/testng-eclipse-update-site/7.4.0
Now we will discuss the steps to integrate.
Steps to Integrate
Step-1 : In Eclipse, go to Help menu -> click on Install New Software.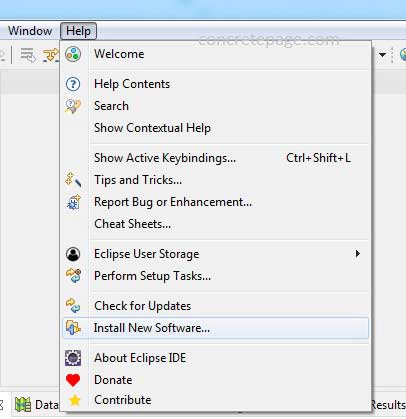
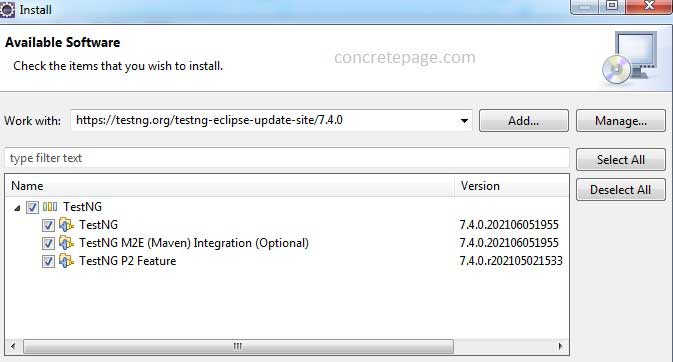
Step-2 : Enter update site URL
https://testng.org/testng-eclipse-update-site/7.4.0.
Step-3 : Click on Next.
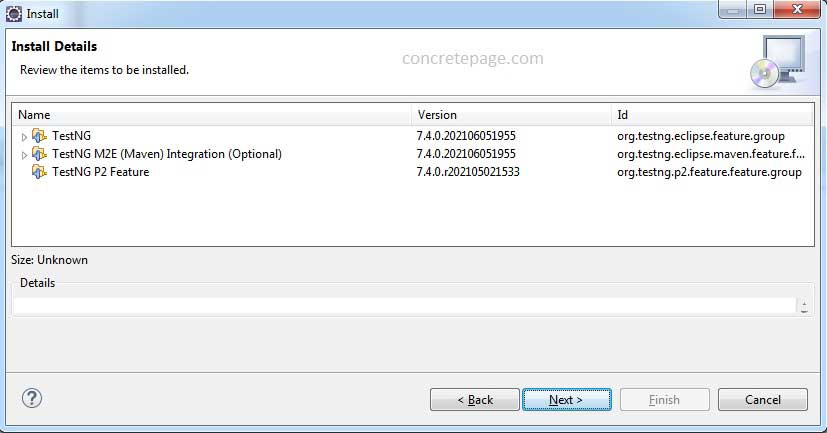
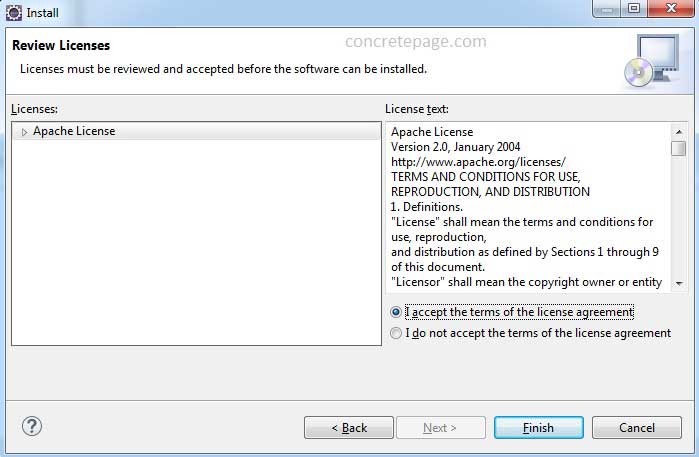
Step-4 : Accept the terms. Then click Finish.
Step-5 : Click on Install anyway.

Step-6 : Click on Restart Now.

Step-7 : To create TestNG tests, we need following Maven dependency.
<dependency>
	<groupId>org.testng</groupId>
	<artifactId>testng</artifactId>
	<version>7.7.1</version>
	<scope>test</scope>
</dependency>
Step-8 : Create a sample test using TestNG.
package com.concretepage;
import static org.testng.Assert.assertEquals;
import org.testng.annotations.*;

public class MySimpleTest {
 @BeforeClass
 public void setUp() {
   System.out.println("Test setup completed.");
 }
 @Test
 public void addTest() {
   assertEquals(20 + 30, 50);
 }
 @Test
 public void multiplyTest() {
   assertEquals(5 * 15, 75);
 }
 @AfterClass
 public void destroy() {
   System.out.println("Resources are released.");
 }
}
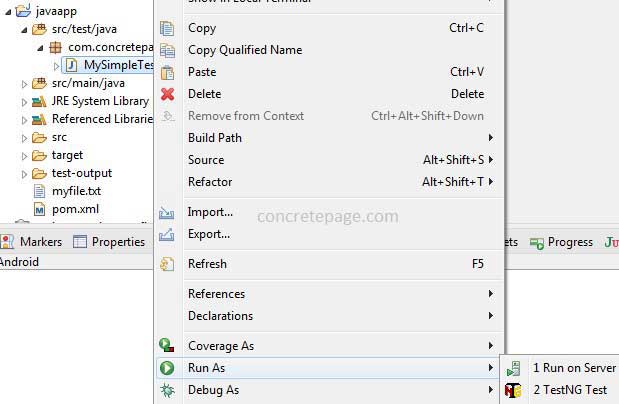
Step-9 : To run our tests, right click on test file -> Run As -> TestNG Test.
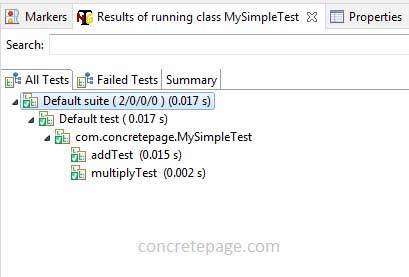
Step-10 : We can see test results as below.
