How to Install Tomcat in Eclipse IDE
August 23, 2013
In our development environment, if we integrate tomcat with eclipse, it becomes easy to start and stop server and to deploy archive in Tomcat. We can see the server log in eclipse console. To install tomcat in eclipse, you have follow below steps. 1. Install eclipse
2. Install Tomcat
3. Set JAVA_HOME in environment variable.
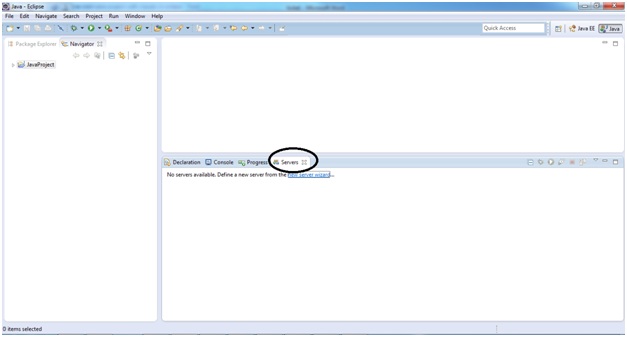
4. Go to Window -> Show View ->Other and search for server and click on server. It will look like

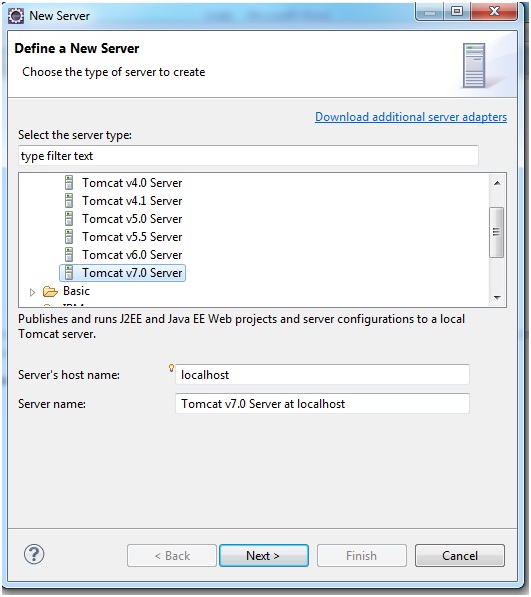
5. Click on new server wizard and you will see below screen . Here you define new server. In our demo we integrate Tomcat 7.

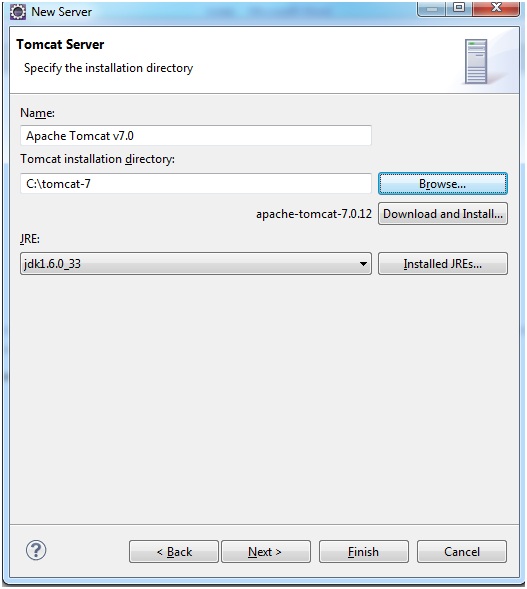
6. Click next and select Tomcat installation directory.

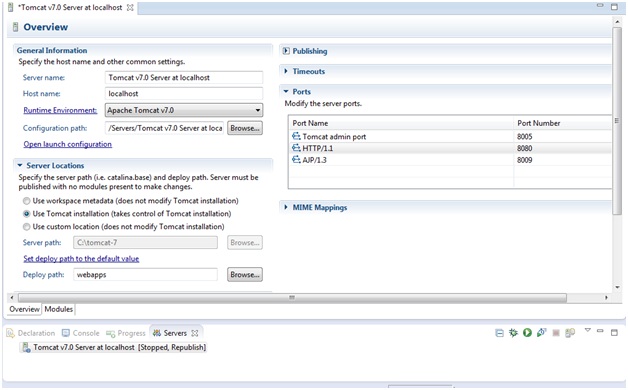
7. Click on Finish. Eclipse integration of Tomcat server is complete. To change the port and to set deploy path click on the server and you will see the below screen. Do changes and then save it.

8. To start server right click on Tomcat -> start or debug(for debug mode.) and then run the url http://localhost:8080


