Java Project + Gradle + Eclipse Integration Example
July 26, 2014
In this page, we will learn using Gradle in our project from scratch. We will see how to install plugin in eclipse for Gradle and installation of Gradle binary in OS. We will see how to write Gradle script to create JAR and WAR. We will run the Gradle command to configure classpath in eclipse. We will see all these step by step.
Software Dependency
In our demo to run a simple java program building with Gradle , we are using below softwares.1. JDK 6
2. Eclipse Juno
3. Gradle-2.0
Integrate Gradle Plugin in eclipse
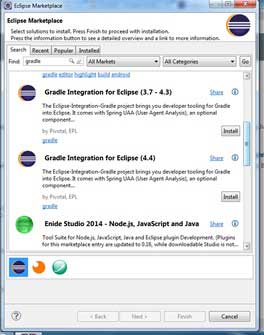
To integrate Gradle in eclipse go to Help->Eclipse Marketplace and search for Gradle. Install Gradle Integration for Eclispe. Find the below figure.


Install Gradle Binary in OS
You also need to download Gradle binary and install into your system. Find the Gradle binary from below location.Download Gradle
After installation, set path variable for bin location in system environment.
Write a Gradle Script for War
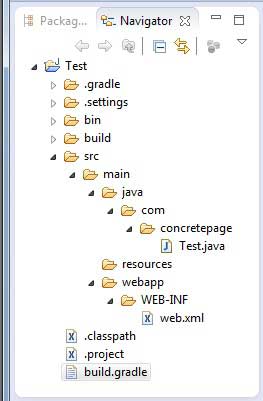
Create a java project and create directory structure as below and set src as below.1. src/main/java
2. src/main/resources
3. src/main/webapp
Find the eclipse structure.

build.gradle
apply plugin: 'java'
apply plugin: 'eclipse'
apply plugin: 'war'
archivesBaseName = 'Concretepage'
version = '1.0-SNAPSHOT'
repositories {
    mavenCentral()
}
dependencies {
   compile  'org.apache.commons:commons-lang3:3.0'
   compile  'log4j:log4j:1.2.16'

}
apply plugin: 'war'
repositories {
    mavenCentral()
}
dependencies {
   compile  'org.apache.commons:commons-lang3:3.0'
   compile  'log4j:log4j:1.2.16'

}
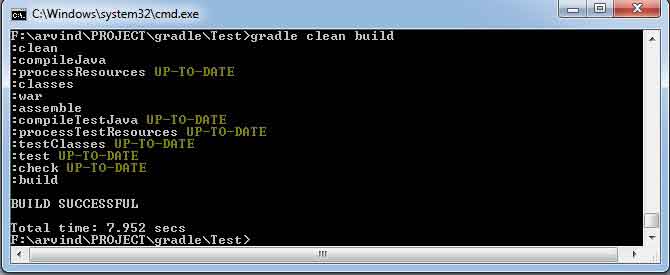
gradle clean build

Configure Java Project Classpath in Eclipse Using Gradle
Gradle provides command to configure classpath of the project for all jar dependency. In the Gradle script the below line is required.apply plugin: 'eclipse'

Create a Java Simple Program in Eclipse
Now we will create a simple java program to test. We are using common lang and log 4j class to test our gradle build.Test.java
package com.concretepage;
import org.apache.commons.lang3.StringUtils;
import org.apache.log4j.Logger;
public class Test {
  public static void main(String[] args) {
	 Logger logger = Logger.getLogger(Test.class);
	 logger.debug("Starting demo");
	 String s = "Some Value";
	 if(!StringUtils.isEmpty(s)){
		 System.out.println("Welcome ");
	 }
	 logger.debug("End of demo");
  }
}
Write a Gradle Script for Jar
To create a JAR you can use below Gradle script.build.gradle
apply plugin: 'java'
apply plugin: 'eclipse'
archivesBaseName = 'Concretepage'
version = '1.0-SNAPSHOT'
repositories {
    mavenCentral()
}
jar {
	manifest {
		attributes 'Main-Class': 'com.concretepage.Test'
	}
}
dependencies {
   compile  'org.apache.commons:commons-lang3:3.0'
   compile  'log4j:log4j:1.2.16'

}


