Angular + Eclipse "Hello World" Example
October 06, 2017
This page will walk through creating Angular project using Angular IDE/Eclipse for "Hello World" example. Here we will install Angular IDE by Webclipse. We can install Angular IDE by downloading it or by using NPM command. We can also install Angular IDE plugin in Eclipse. On this page we will provide step by step detail for how to work with Angular IDE, to create Angular project and to run it. We can create new project as well as we can import our existing project in Angular IDE to work on it. We will also provide how to change default theme, to change default server port and to change default syntax coloring. By changing port project wise we can run more than one Angular project all together on different ports. If we have installed neither Node.js nor NPM and nor Angular CLI then Angular IDE will install all these for us while creating project. If we have already installed them, we can select their system installed version while creating project and importing project using Angular IDE. Now let's start working on Angular IDE step by step.
Contents
- Step-1: Install Angular IDE
- Step-2: Change Angular IDE Theme
- Step-3: Change Angular HTML Syntax Coloring
- Step-4: Create Angular Project
- Step-5: Create Project Files: Component, Pipe, Service etc
- Step-6: Enable/Disable Formatting Rules using tslint.json
- Step-7: Run Angular Project
- Step-8: Import Existing Project in Angular IDE
- Step-9: Change Server Port
- Reference
- Download Source Code
Step-1: Install Angular IDE
We can install Angular IDE in following ways.1. Using Angular IDE download link
Visit the below link to download and install Angular IDE.
Download Angular IDE by Webclipse
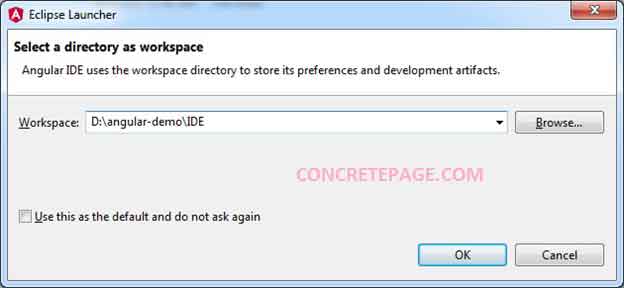
When we launch the IDE, it will ask for Workspace. We can select a directory for Workspace where we want to keep our Angular projects.
If NPM is already installed, we can run following commands to install Angular IDE.
a. Run below command.
npm install -g angular-ide

ngide install E:\IDE

angularide.exe file Located in E:\IDE\angular-ide.
3. Install Angular IDE plugin in Eclipse
If we are already using Eclipse, we can install Angular IDE plugin in it. To install it, go to Eclipse Marketplace and search for Angular IDE using "Find" section. Select the Angular IDE as given in the print screen. Now click on "Install" to install this plugin.
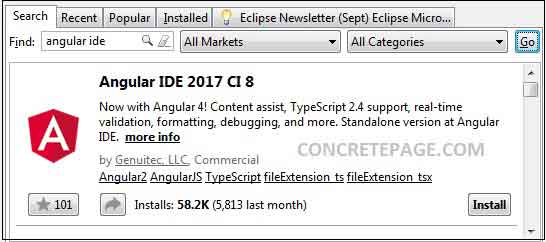
Eclipse Marketplace: Angular IDE
In this way we will get Angular IDE in Eclipse.
Step-2: Change Angular IDE Theme
If we don't like the default theme of Angular IDE, we can change it. To change theme, go to Window -> Preferences -> Appearance and change it as required. I have changed it to Windows theme.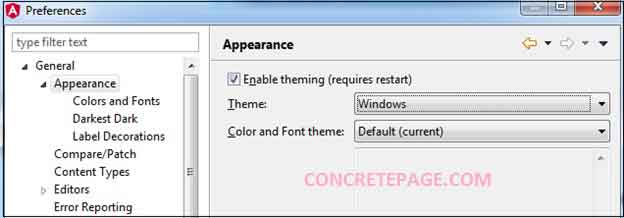
Step-3: Change Angular HTML Syntax Coloring
To change Angular HTML syntax coloring, go to Window -> Preferences -> Web -> Angular HTML Editor -> Syntax Coloring . Here we will get syntax elements as following.Angular Directive Name
Angular Expression
Angular Expression Border
We can change foreground, background color etc of the above syntax elements. I have set Angular HTML syntax coloring as following.

Step-4: Create Angular Project
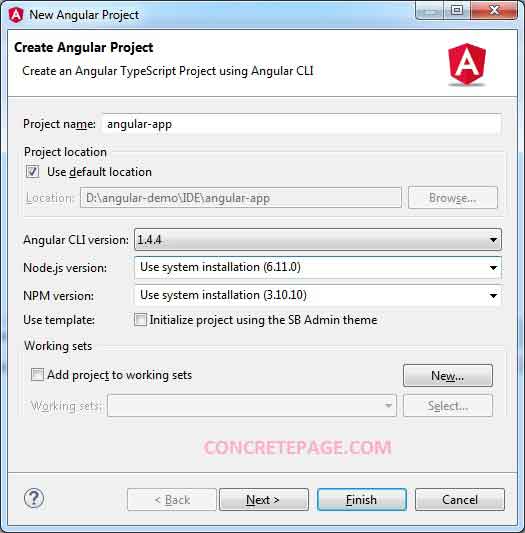
Now we will create Angular project from scratch. Go to File> New > Angular Project.Here we have to fill project name and to select Angular CLI version, Node.js version and NPM version. If we have already installed Angular CLI, Node.js and NPM, then select their version accordingly. For Node.js and NPM we can select "Use system installation" and it will select the installed version of them in the system.
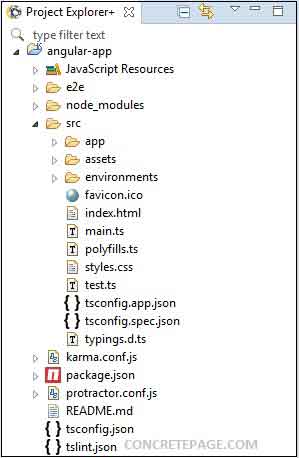

Step-5: Create Project Files: Component, Pipe, Service etc
Right click on "app" folder of the project. We can create files of the project as required such as Component, Pipe, Service, Class, Enum, Interface etc.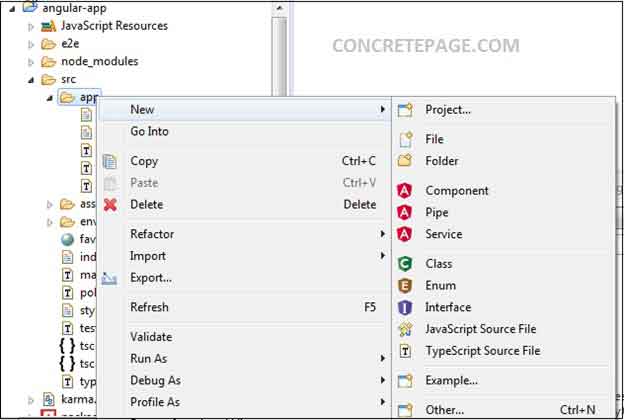
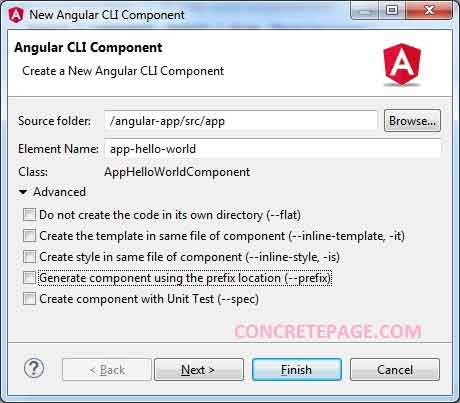
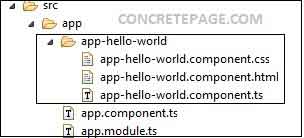
app-hello-world.component.ts
import { Component, OnInit } from '@angular/core';

@Component({
  selector: 'app-hello-world',
  templateUrl: './app-hello-world.component.html',
  styleUrls: ['./app-hello-world.component.css']
})
export class AppHelloWorldComponent implements OnInit {
  message = 'Hello Angular World!';
  constructor() { }

  ngOnInit() {
  }
}
<h1>
  {{message}}
</h1>
h1 {
  color: #369;
  font-family: Arial, Helvetica, sans-serif;
  font-size: 250%;
}
import { Component } from '@angular/core';
@Component({
  selector: 'app-root',
  template: `
         <app-hello-world></app-hello-world>
      `,
})
export class AppComponent {
}
import {NgModule} from '@angular/core';
import {BrowserModule} from '@angular/platform-browser';

import { AppComponent } from './app.component';
import { AppHelloWorldComponent } from './app-hello-world/app-hello-world.component';

@NgModule({
  imports:      [
    BrowserModule
  ],
  declarations: [
    AppComponent,
    AppHelloWorldComponent
  ],
  bootstrap: [ AppComponent ]
})
export class AppModule { }
Step-6: Enable/Disable Formatting Rules using tslint.json
To enable/disable indent rule, import-spacing rule, max-line-length rule etc, we can make changes intslint.json file. tslint.json file can be found in every project parallel to src folder. To enable any formatting rule, use the true value and to disable it use false value. For the example, suppose we want to disable import-spacing and indent rule for spaces, we change value in tslint.json as following.
tslint.json
------

"import-spacing": false,
"indent": [
  false,
  "spaces"
]

------
Step-7: Run Angular Project
We can run our project in two ways.1. Go to Servers view. By default we can find it on the bottom of left panel. If it is not available, we can find it by navigating to Window -> Show View -> Servers . Click on Angular CLI and we can see our project listed there. Now right click on the project to start and stop server.
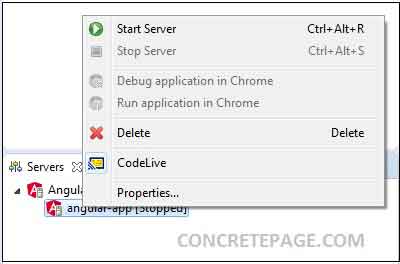
2. We can run project using ng serve from the Terminal+ view. Terminal+ can be found on the bottom panel by default. If it is not available we can bring it by navigating to menu Window -> Show View -> Terminal+. Click on (+) to get a terminal to run the command. We can open more than one terminal by clicking on (+) sign.

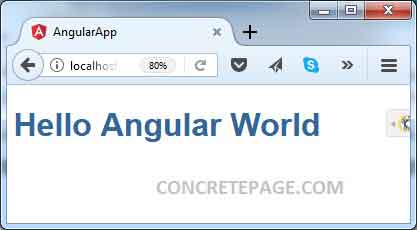
After complete server startup by any above method, hit the below URL to access the application.
http://localhost:4200/
Step-8: Import Existing Project in Angular IDE
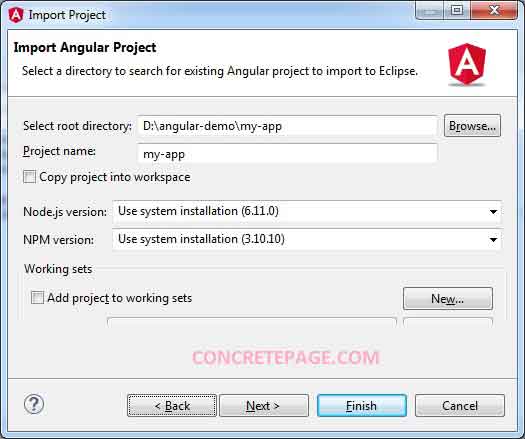
If we wish to work on existing Angular project using Angular IDE we can import it. To import existing Angular project in Angular IDE, follow the below steps.1. Go to File-> Import
2. Select Angular Project and then click on Next button. Here we need to select root directory of our existing project. Root directory is the parent directory of src folder. We will also select Node.js and NPM version. We can select "Use system installation". Find the print screen.
Step-9: Change Server Port
We can change the default port 4200 for any angular application listed in our Angular IDE. We can run more than one Angular Application simultaneously with different port. To change the port for any angular application, find the following steps.1. Go to Servers view. By default we can find it on the bottom of left panel. If it is not available, we can find it by navigating to Window -> Show View -> Servers . In our example we have two Angular projects that we will run with different ports together.
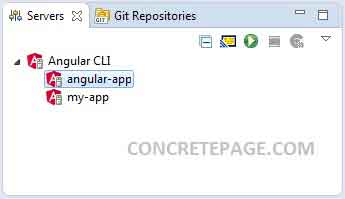
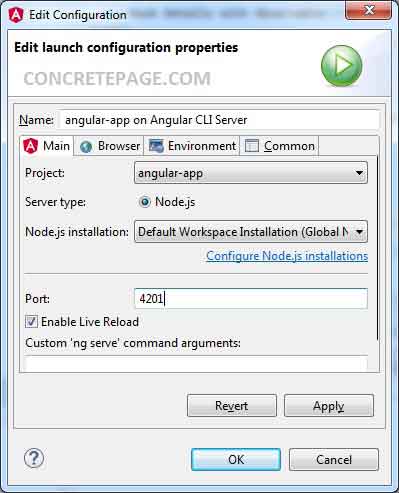
3. To start server for any project, right click on the project and click on Start Server. In this way we can start server for both project. We can access those applications using following URLs.
http://localhost:4201/
http://localhost:4200/
Note: We can also use Visual Studio Code source editor for Angular project development. It is free, open source and runs everywhere. Find the link for Visual Studio Code.
Visual Studio Code


